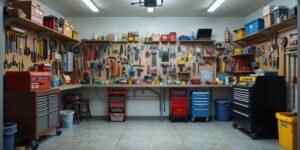
Garages can quickly become overcrowded with tools, sports equipment, and seasonal decorations. For those with limited space, an efficient storage solution can make all the difference. A sliding storage system is a fantastic way to maximize vertical and ceiling space while keeping your garage organized. In this guide, we’ll show you how to design and build your own sliding storage system, step by step.
Why Choose a Sliding Storage System?
- Space-Saving: Sliding systems utilize underused areas like ceilings and walls.
- Convenience: Easy access to stored items without moving heavy objects around.
- Customizable: Tailor the system to your specific needs and available space.
Let’s dive into the process!
Materials and Tools You’ll Need
Before starting, gather the following materials and tools:
Materials
- Sliding track kits (available at most hardware stores).
- Storage bins with lids.
- Plywood or metal brackets (for custom shelves).
- Screws, anchors, and mounting hardware.
Tools
- Drill and drill bits.
- Measuring tape.
- Saw (if cutting custom shelves).
- Stud finder.
- Level.
Step 1: Assess Your Garage Space
Start by evaluating your garage’s layout:
- Measure the Walls and Ceiling: Take accurate measurements of the available space.
- Identify Stud Locations: Use a stud finder to locate secure areas for mounting the tracks.
- Plan the System Layout: Decide where you’ll install the sliding system. Popular areas include ceilings for overhead storage or walls for sliding shelves.
Pro Tip:
If your garage has a high ceiling, consider installing a multi-level sliding system to maximize storage potential.
Step 2: Choose the Right Storage System
There are two main types of sliding storage systems:
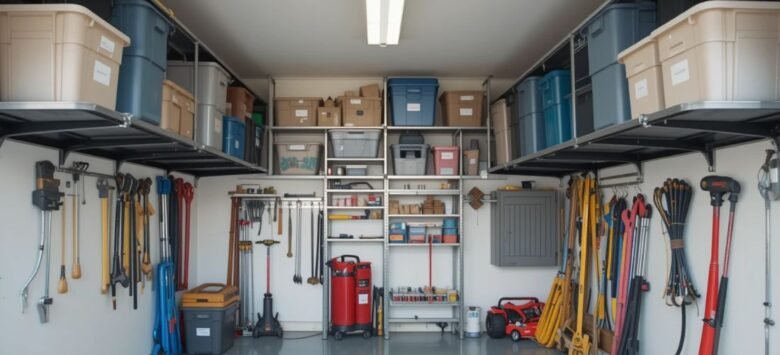
Overhead Sliding Bins
-
- Ideal for seasonal items and rarely used equipment.
- Use sturdy tracks and durable bins to ensure safety.
Wall-Mounted Sliding Shelves
-
- Perfect for frequently accessed tools and supplies.
- Install shelves on tracks that slide horizontally for easy access.
Choose the system that best suits your needs—or combine both for maximum efficiency.
Step 3: Install the Sliding Tracks
Follow these steps to install your sliding tracks:
- Mark the Mounting Points: Using your stud finder, mark where the tracks will be secured.
- Drill Pilot Holes: Drill small pilot holes into the studs to make installation easier.
- Attach the Tracks: Secure the tracks to the wall or ceiling using screws and anchors.
- Test the Tracks: Slide a bin or shelf along the track to ensure smooth movement.
Common Mistake to Avoid:
Do not mount tracks directly onto drywall without anchors or studs, as they may not support heavy loads.
Step 4: Prepare and Install Storage Bins or Shelves
For Overhead Bins
- Choose bins with lids to keep items dust-free.
- Attach brackets or hooks to the bins for sliding onto the tracks.
- Label the bins for easy identification.
For Wall-Mounted Shelves
- Cut plywood or metal sheets to the desired shelf size.
- Secure brackets to the shelves and mount them onto the sliding tracks.
- Arrange items by category to keep the system organized.
Pro Tip:
For added stability, use anti-slip liners on shelves or bins to prevent items from shifting.
Step 5: Organize and Maintain
Once your sliding storage system is installed, it’s time to organize:
- Categorize Items: Group similar items together, such as tools, sports gear, or holiday decorations.
- Create Zones: Assign specific areas for frequently used and rarely accessed items.
- Regular Maintenance: Check the tracks and hardware periodically to ensure everything is secure and functioning properly.
Recommended Tools and Accessories
Here are a few additional items to enhance your storage system:
- Magnetic Tool Holders: Ideal for organizing metal tools on sliding shelves.
- Clear Bins: Allow you to see the contents without opening the lids.
- LED Strip Lighting: Install under shelves to improve visibility in dim areas.
Real-Life Example: A Small Garage Transformation
Mark, a homeowner with a single-car garage, installed an overhead sliding bin system to store his family’s camping gear. By using durable bins and ceiling-mounted tracks, he freed up valuable floor space and created a clutter-free environment. His project cost less than $200 and took only a weekend to complete.
Before and After:
- Before: Cluttered floor space with gear piled in corners.
- After: Neatly organized bins overhead, leaving room for the car and a small workbench.
With a DIY sliding storage system, even the smallest garages can become highly functional and organized spaces. Whether you choose overhead bins, wall-mounted shelves, or a combination of both, this project will revolutionize your storage game. Start planning today and enjoy a clutter-free garage tomorrow!
Reviewed and updated on 01/24/2025