
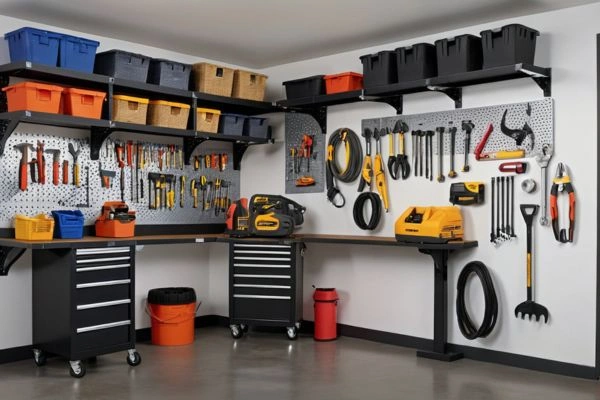
Is your garage cluttered with tools, equipment, and seasonal items, leaving little room for vehicles or projects? The solution may be overhead! A garage ceiling storage system is a perfect way to maximize unused vertical space, keep your belongings organized, and free up valuable floor area.
In this step-by-step guide, we’ll show you how to build a ceiling storage system for tools and equipment—efficiently, safely, and affordably.
Why Ceiling Storage Is a Game-Changer for Garages
Before we dive into the steps, here’s why investing in a ceiling storage system is so effective:
- Maximizes Vertical Space: Utilizes the often-overlooked ceiling area.
- Frees Up Floor Space: Creates room for vehicles, workbenches, or other activities.
- Organizes Tools and Equipment: Keeps everything in its place for easy access.
- Enhances Safety: Elevates heavy or hazardous items, reducing the risk of accidents.
- Ideal for Small Garages: Makes even compact spaces more functional.
Materials and Tools You’ll Need
Here’s what you’ll need to get started:
Materials
- Plywood or pre-cut wood boards (3/4” thick for durability)
- Heavy-duty L-brackets or ceiling storage rails
- Wood screws or lag bolts
- Stud finder
- Hooks or pulley systems for hanging items (optional)
Tools
- Drill and screwdriver
- Measuring tape
- Level
- Circular saw or handsaw (for cutting boards)
- Ladder or step stool
- Pencil for marking
Step-by-Step Guide to Building a Ceiling Storage System
Step 1: Measure and Plan Your Space
Start by assessing your garage ceiling:
- Use a stud finder to locate ceiling joists. Ceiling joists provide the structural support needed to hold weight.
- Measure the space between joists to determine where your storage system will fit.
- Decide on the dimensions of your shelves or platforms based on the items you plan to store.
Tip: Leave sufficient clearance so you don’t interfere with garage doors or parked vehicles.
Step 2: Choose Your Ceiling Storage Design
Based on your needs, select one of these popular designs:
- Fixed Ceiling Shelves: Sturdy plywood platforms supported by L-brackets anchored to ceiling joists.
- Sliding Ceiling Tracks: Rails with sliding bins for easy access. Ideal for storing lightweight items.
- Hanging Hooks or Pulley Systems: Best for bikes, ladders, or tools you need to access regularly.
For this guide, we’ll focus on building fixed ceiling shelves—a cost-effective and versatile option.
Step 3: Install the Support Brackets
Mark the Placement:
-
- Using a pencil, mark where the L-brackets or rails will attach to the ceiling joists. Ensure the spacing is consistent and level.
- Check your measurements twice to avoid errors.
Attach the Brackets:
-
- Drill pilot holes into the ceiling joists where you’ve made the marks.
- Secure the L-brackets or support rails to the joists using heavy-duty screws or lag bolts.
Safety Note: The brackets must be firmly attached to structural joists, not drywall, to handle weight safely.
Step 4: Prepare and Install the Shelves
Cut the Plywood:
-
- Use a circular saw or handsaw to cut the plywood or wood boards to the desired dimensions.
- Sand the edges to ensure a smooth finish and prevent splinters.
Place the Shelves on the Brackets:
-
- Position the plywood boards on the installed brackets.
- Use screws to secure the shelves to the brackets for added stability.
Test Stability:
-
- Gently apply pressure to test that the shelves are sturdy and properly supported.
Step 5: Organize Tools and Equipment
Now that your ceiling storage system is ready, it’s time to organize your items:
- Place heavy items (like toolboxes) in the center of the shelves to distribute weight evenly.
- Store seasonal items (like holiday decorations or camping gear) on the outer sections of the shelves.
- Use clear plastic bins to organize smaller items and label them for easy identification.
- Add hooks or hanging racks underneath the shelves for tools, extension cords, or lightweight equipment.
Safety Tips for Ceiling Storage Systems
- Weight Limits: Never exceed the weight capacity of your brackets, shelves, or joists. Check manufacturer specifications for guidance.
- Even Weight Distribution: Spread items evenly across the shelves to prevent imbalance.
- Accessible Items: Use a stable ladder or step stool to access the shelves safely.
- Routine Inspections: Periodically check screws, brackets, and shelves for signs of wear or loosening.
Tip: Avoid storing flammable materials or hazardous chemicals near the ceiling.
Common Mistakes to Avoid
Building a ceiling storage system is straightforward, but these mistakes can compromise safety and functionality:
- Ignoring Weight Limits: Overloading shelves can cause structural damage or accidents.
- Improper Installation: Failing to anchor brackets to ceiling joists can lead to collapse.
- Neglecting Clearance: Ensure shelves don’t obstruct garage doors or ceiling lights.
- Cluttered Storage: Use labeled bins and hooks to keep items organized and easily accessible.
Benefits of a Ceiling Storage System
A well-designed garage ceiling storage system offers numerous advantages:
- Increased Space: Keeps the garage floor clear for vehicles, projects, or hobbies.
- Enhanced Organization: Tools and equipment are neatly stored and easy to find.
- Reduced Clutter: Eliminates piles of boxes and random items cluttering the space.
- Improved Safety: Keeps hazardous items out of reach of children and pets.
Conclusion
Building a ceiling storage system is an excellent way to reclaim valuable space in your garage while keeping tools and equipment organized. By following these step-by-step instructions, you’ll create a safe, sturdy, and efficient storage solution that maximizes your garage’s potential.
With a little planning, the right materials, and some effort, you can transform your garage into a clean, organized, and clutter-free space. Start your project today and enjoy the benefits of a more functional garage!
Reviewed and updated on 01/24/2025