
Tired of crowded gyms, expensive memberships, and the struggle to fit workouts into your busy schedule? The solution is closer than you think—right in your garage! Turning your garage into a fully functional home gym is not only cost-effective but also an excellent way to personalize your fitness journey.
In this guide, we’ll walk you through how to build a complete home gym in your garage, step-by-step, covering everything from layout planning to equipment essentials.
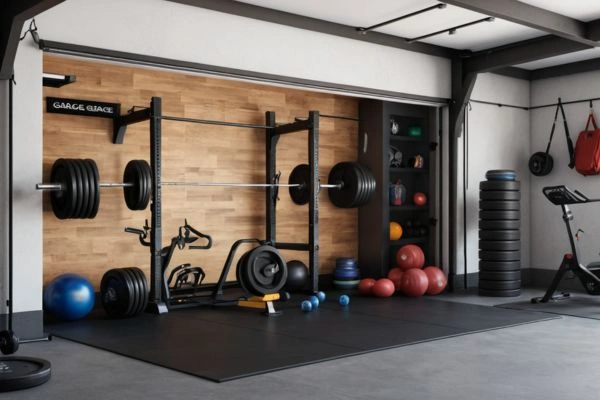
Benefits of a Garage Home Gym
Before diving into the steps, here’s why having a home gym in your garage is a game-changer:
- Saves Time: No more commuting to the gym; workout whenever you want.
- Cost-Effective: Avoid recurring membership fees.
- Customizable: Design your gym with the exact equipment and layout you need.
- Privacy and Comfort: Work out at your pace, without the pressure of a crowded space.
- Increases Home Value: A well-designed garage gym can add value to your property.
Step 1: Plan the Layout of Your Garage Gym
Start by measuring your garage space and determining the gym’s layout. Consider these tips:
- Clear Zones: Divide your space into areas for cardio, strength training, and functional fitness.
- Measure Before Buying: Ensure equipment like treadmills or squat racks fit without crowding the space.
- Keep It Open: Leave enough space for free movement, especially for functional exercises like lunges or burpees.
Tools like SketchUp or even a simple pen-and-paper layout can help you visualize the design.
Step 2: Clean and Prepare the Garage
Garages can be dusty, cluttered, and poorly maintained. Start fresh by:
- Decluttering: Remove everything you don’t need. Donate, sell, or discard old items.
- Deep Cleaning: Sweep, wash, and disinfect the garage floor and walls.
- Fixing Issues: Address mold, leaks, or cracks. A clean space sets the foundation for your home gym.
For better organization, use storage bins or wall hooks to manage remaining garage tools or items.
Step 3: Choose the Right Flooring
Flooring is essential for safety, comfort, and equipment longevity. Options include:
- Rubber Flooring: Durable, shock-absorbent, and great for heavy equipment.
- Interlocking EVA Foam Tiles: Budget-friendly, easy to install, and soft for bodyweight workouts.
- Carpet Tiles: Comfortable and affordable but may wear down faster.
Rubber mats are ideal for areas where you’ll use heavyweights, while foam tiles work well for yoga or bodyweight zones.
Step 4: Pick Essential Equipment
Focus on versatile equipment to maximize workouts without cluttering the space. Here’s a breakdown by category:
Cardio
- Treadmill (foldable to save space)
- Stationary bike or rowing machine
- Jump rope (a budget-friendly option)
Strength Training
- Adjustable dumbbells (replace multiple sets of weights)
- Kettlebells for functional movements
- A power rack with a barbell and weight plates for squats, deadlifts, and presses
Functional Training
- Resistance bands for versatile strength workouts
- Medicine ball or slam ball for core and power training
- TRX suspension trainer for full-body workouts
Optional Add-ons: Weight benches, mirrors, and plyometric boxes can enhance the gym as your fitness level grows.
Step 5: Optimize Lighting and Ventilation
A well-lit, fresh environment will motivate you to train consistently:
- Lighting: Install bright LED lights that mimic daylight. Add task lighting near mirrors or benches.
- Ventilation: Use fans, open windows, or install an exhaust system to keep air flowing. Proper ventilation also helps prevent equipment rust.
Step 6: Organize and Maximize Space
A cluttered gym reduces motivation, so organization is key. Here are quick tips:
- Wall Storage: Install pegboards or wall hooks for hanging equipment like jump ropes and resistance bands.
- Vertical Racks: Use vertical dumbbell racks and weight plate holders to free up floor space.
- Ceiling Solutions: Overhead storage for items you don’t use regularly.
A clean, organized garage gym ensures your workouts flow smoothly without unnecessary interruptions.
Step 7: Add Personal Touches for Motivation
Make your garage gym a space that energizes you:
- Mirrors: Great for checking form and making the space feel larger.
- Sound System: Set up Bluetooth speakers for your favorite workout playlists.
- Motivational Decor: Posters, a whiteboard for tracking progress, or a workout calendar can inspire consistency.
Common Mistakes to Avoid
- Overbuying Equipment: Start with the essentials and upgrade as needed.
- Neglecting Safety: Ensure equipment is stored safely and floors are non-slip.
- Ignoring Budget-Friendly Options: You don’t need expensive machines—focus on versatile gear first.
- Poor Layout Planning: Avoid cramming too much into a small space. A clean, open layout is better.
Sample Budget for a Complete Home Gym
Here’s an example of how you can build a home gym for different budgets:
- Low Budget ($300-$500): Resistance bands, adjustable dumbbells, foam mats, and jump rope.
- Mid Budget ($1,000-$2,000): Kettlebells, power rack, barbell with plates, and a folding treadmill.
- Premium Budget ($3,000+): High-end cardio machines, full dumbbell sets, weight benches, and smart gym tech.
You can start small and gradually upgrade as your fitness routine evolves.
Conclusion
Creating a home gym in your garage is one of the smartest ways to stay fit without leaving your home. It saves time, money, and provides the flexibility to work out whenever you want. By following this step-by-step guide, you can build a space that fits your fitness goals, lifestyle, and budget.
Start today, and soon you’ll have a Garage Home Gym that keeps you motivated and on track. No excuses, no limits—just results!
Reviewed and updated on 01/24/2025