
If you’ve ever struggled to find the right tool or gear in a cluttered garage or workspace, it’s time for a smart storage upgrade. A pegboard wall is one of the simplest and most effective ways to keep tools organized, visible, and easily accessible.
This step-by-step guide will help you build the perfect pegboard wall, ensuring a functional and efficient storage system for your tools and equipment.
Why Choose a Pegboard Wall?
A pegboard wall is more than just a storage solution—it’s a game changer for organization. Here’s why:
✔ Visibility – Tools are easy to see and access at all times.
✔ Customization – Hooks, shelves, and bins can be rearranged to fit your changing needs.
✔ Maximized Space – Utilizes vertical wall space, freeing up floor and work surfaces.
✔ Easy Installation – A simple DIY project that requires basic tools and effort.
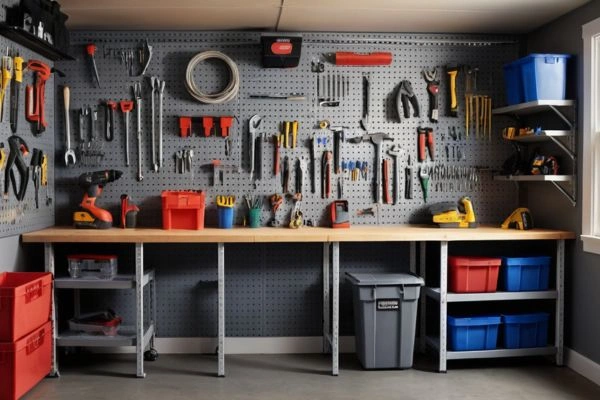
✔ Aesthetics – A well-organized pegboard creates a clean, professional look.
Whether you’re organizing a garage, workshop, or craft station, a pegboard wall offers unmatched flexibility.
Materials and Tools You Will Need
Before you start, gather the necessary materials and tools:
Materials
✔ Pegboard Panel – Precut or custom-sized pegboard (standard 4×8 feet or smaller).
✔ Wood Spacers or Furring Strips – Creates space behind the pegboard for hook placement.
✔ Wood Screws – Secures the pegboard and spacers to the wall.
✔ Hooks & Accessories – Variety of hooks, shelves, bins, and brackets.
✔ Paint & Sealant (Optional) – For a clean and polished finish.
Tools
✔ Measuring Tape
✔ Level
✔ Pencil
✔ Drill & Screwdriver
✔ Saw (if cutting pegboard or spacers to size)
✔ Stud Finder
✔ Sandpaper (for finishing edges)
Step-by-Step Guide to Building the Perfect Pegboard Wall
Step 1: Measure and Plan Your Space
✔ Choose a Wall – Identify a suitable area free from obstructions (outlets, windows, pipes).
✔ Measure the Area – Use a measuring tape to determine the dimensions of the space.
✔ Select the Pegboard Size – Purchase a panel that fits or cut it to size using a saw.
✔ Mark Wall Studs – Use a stud finder to locate wall studs for support.
💡 Pro Tip: For large areas, use multiple pegboard panels side by side for seamless coverage.
Step 2: Prepare the Pegboard and Wall
✔ Cut Furring Strips or Spacers – Ensure a 1-inch gap between the pegboard and wall for hook clearance.
✔ Mark & Install the Spacers – Use a level and pencil to mark lines where the spacers will go.
✔ Attach the Strips to Wall Studs – Secure them with screws to provide strong support.
💡 Pro Tip: Paint the pegboard before installation for a clean, professional finish.
Step 3: Install the Pegboard
✔ Position the Pegboard – Align the panel over the spacers, ensuring a flush fit.
✔ Secure the Pegboard – Drill wood screws through the pegboard holes into the spacers.
✔ Check Stability – Press lightly on the board to ensure there’s no movement.
💡 Pro Tip: Use a level to confirm the pegboard is evenly aligned for a clean look.
Step 4: Customize and Organize Your Pegboard
Now comes the fun part—arranging your tools and gear!
✔ Add Hooks & Accessories – Use:
- Standard hooks for hand tools (hammers, wrenches, pliers).
- Bins & baskets for screws, nails, and small items.
- Brackets & shelves for power tools and larger gear.
✔ Group Similar Items Together – Organize tools by type and frequency of use.
✔ Label Sections – Adding labels helps maintain long-term organization.
✔ Balance the Weight – Distribute heavy tools evenly to prevent sagging.
💡 Pro Tip: Arrange tools on the floor first to plan your layout before installing hooks.
Maintenance Tips for Your Pegboard Wall
✔ Reorganize Regularly – Rearrange hooks and bins as your tool collection grows.
✔ Clean Periodically – Dust the pegboard and wipe down tools to keep it looking fresh.
✔ Check Stability – Inspect hooks and screws to ensure they stay secure.
✔ Expand as Needed – Install additional pegboard panels for more storage space.
Common Mistakes to Avoid
🚫 Skipping Spacers – Without proper spacing, hooks won’t fit correctly.
🚫 Overloading the Pegboard – Avoid hanging excessively heavy items without support.
🚫 Poor Planning – Map out the layout first to avoid cluttered organization.
🚫 Ignoring Wall Studs – Pegboards must be secured to studs for durability.
Conclusion
Building the perfect pegboard wall is a straightforward and rewarding project. By following this step-by-step guide, you can turn unused wall space into a highly functional, organized, and visually appealing storage system.
Whether you’re an avid DIYer, a mechanic, or just want a clutter-free garage, a pegboard wall offers efficiency and versatility.
Start your project today and transform your workspace! 🚀
Reviewed and updated on 01/24/2025