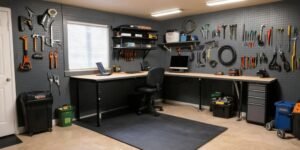
For DIY enthusiasts, an organized workspace is essential for efficiency, creativity, and safety. A tool wall is one of the most practical and visually appealing ways to organize your tools and ensure everything is within arm’s reach. Whether you’re setting up a new workshop or upgrading an existing one, this guide will help you design the perfect tool wall to make your DIY projects smoother and more enjoyable.
Why a Tool Wall Is Essential for Your Workshop
Before diving into the steps, let’s explore why every DIY workshop can benefit from a well-planned tool wall:
- Maximizes Space: A tool wall utilizes vertical space, freeing up countertops and floors.
- Improves Efficiency: Tools are always visible and accessible, saving time searching for items.
- Enhances Organization: Everything has a designated spot, reducing clutter.
- Inspires Creativity: A clean, organized workspace makes DIY projects more enjoyable.
- Increases Safety: Proper storage minimizes hazards like tools left lying around.
Now, let’s get started on building a functional and stylish tool wall.
Step 1: Plan Your Tool Wall Layout
The first step to creating your perfect tool wall is careful planning. Start by assessing your tools, space, and workflow.
Assess Your Tools
- Gather all your tools and group them into categories: hand tools, power tools, gardening tools, etc.
- Identify which tools you use most frequently—these should be the easiest to access.
Measure Your Space
- Measure the available wall area where the tool wall will be installed.
- Consider the height: Keep commonly used tools at eye level and less-used tools higher or lower.
Create a Rough Layout
- Sketch a simple plan of where each type of tool will go.
- Leave room for future tools—you’ll likely expand your collection over time.
Tip: Use paper cutouts to represent your tools. Tape them to the wall to visualize the layout before installing anything.
Step 2: Choose the Right Tool Wall System
The next step is selecting the right material and system for your tool wall. Here are the top options:
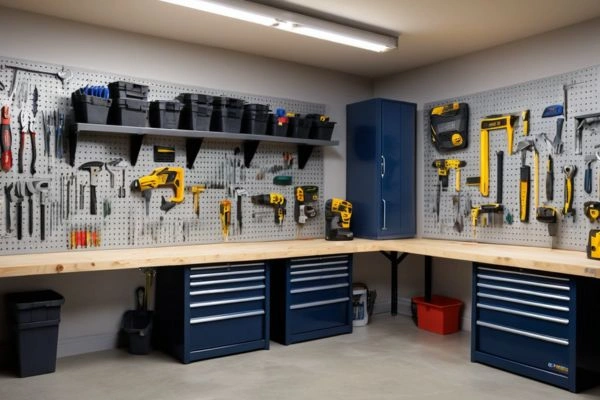
1. Pegboard
Pegboards are a classic choice for tool organization and offer unmatched flexibility.
Benefits:
- Affordable and easy to install.
- Customizable with hooks, bins, and shelves.
- Tools are easy to see and rearrange as needed.
Best For: Hand tools, small power tools, and accessories.
2. French Cleat System
A French cleat system uses interlocking strips of wood or metal to hang tools and shelves.
Benefits:
- Sturdy and versatile—supports heavier tools.
- Easy to adjust or rearrange.
- A clean, professional look.
Best For: Power tools, toolboxes, and shelves for larger equipment.
3. Magnetic Tool Strips
Magnetic strips are ideal for smaller tools like wrenches, screwdrivers, and pliers.
Benefits:
- Tools are highly visible and easy to grab.
- Saves space on pegboards or shelves.
- Simple to install on walls or cabinets.
Best For: Metal hand tools that you use frequently.
4. Slatwall Panels
Slatwalls use horizontal grooves to hold hooks, shelves, and bins securely.
Benefits:
- Versatile system that adapts to various tools.
- Durable and professional-looking.
- Works well for heavy or bulky items.
Best For: Workshops with a variety of tool sizes and storage needs.
Step 3: Install the Tool Wall System
Once you’ve chosen your system, it’s time to install it. Follow these steps for a smooth process:
1. Prepare the Wall
- Clear the space and ensure the wall is clean and free of debris.
- Use a stud finder to locate wall studs for secure installation.
2. Install the Tool Wall Base
- For pegboards, attach furring strips to the wall studs to create space for hooks behind the board.
- For French cleats, secure the cleat strips horizontally, ensuring they are level.
- For slatwalls or magnetic strips, follow the manufacturer’s instructions for secure mounting.
Tip: Use a level to ensure your system is perfectly straight—crooked installations can make tool placement uneven.
Step 4: Organize Your Tools Strategically
With the system installed, it’s time to organize your tools in a way that’s both functional and visually appealing.
1. Group Tools by Type
- Place similar tools together: screwdrivers, hammers, wrenches, drills, etc.
- Use bins or shelves for small accessories like nails, screws, and bolts.
2. Prioritize Accessibility
- Keep frequently used tools at eye level for easy access.
- Store less-used or seasonal tools on higher or lower sections of the wall.
3. Use Labels for Clarity
- Label hooks, bins, or shelves so you know where each tool belongs.
- This keeps your wall organized and helps others find tools easily.
4. Add Specialty Holders
- Use tool-specific holders: drill holders, wrench racks, and clamp organizers.
- Attach magnetic strips for quick access to small metal tools.
Tip: Step back and assess the wall’s layout—tweak as needed to maximize efficiency and style.
Step 5: Enhance Your Tool Wall with Accessories
Make your tool wall even more functional by adding accessories that boost usability and aesthetics.
Accessories to Consider
- LED Lighting: Install strip lights or task lighting to improve visibility.
- Storage Bins: Use labeled bins for screws, bolts, and other small items.
- Shelving: Add shelves for power tools, toolboxes, and heavier equipment.
- Charging Station: Set up a space with power outlets to charge cordless tools.
- Hooks and Hangers: Use adjustable hooks to hold bulky tools like saws or clamps.
Bonus Tip: Use contrasting colors (like black hooks on a white pegboard) to make tools stand out for quick identification.
Maintenance Tips for Your Tool Wall
To keep your tool wall functional and tidy:
- Clean Regularly: Dust tools and wipe down the wall to prevent buildup.
- Reorganize When Needed: Adjust tools as your projects and tool collection evolve.
- Inspect for Damage: Check hooks, cleats, or panels for wear and tear periodically.
Conclusion
Creating the perfect tool wall for your DIY workshop combines functionality, organization, and style. By choosing the right system—whether it’s a classic pegboard, French cleat, or magnetic strip—and organizing tools strategically, you’ll maximize efficiency and turn your workspace into a haven for creativity.
A well-organized tool wall not only saves time but also keeps your tools protected and your workshop clutter-free. Start planning your tool wall today, and enjoy the satisfaction of a workspace that works as hard as you do!
Reviewed and updated on 01/24/2025